The most common mix issues I find are the basic ones. These are issues that could be solved or at least acknowledged by taking a few minutes to review and double-check your actual mix-down.
These are attributes that extend beyond the small, usually specific, “musical” details. All of these can be universally recognized and easily rectified. The most basic issues can be things like missing audio, damaged audio, mislabelled files and other obvious technical mistakes. These tend to be the first things I notice when reviewing and/or mastering a track, and the last things I triple-check for before sending anything out.
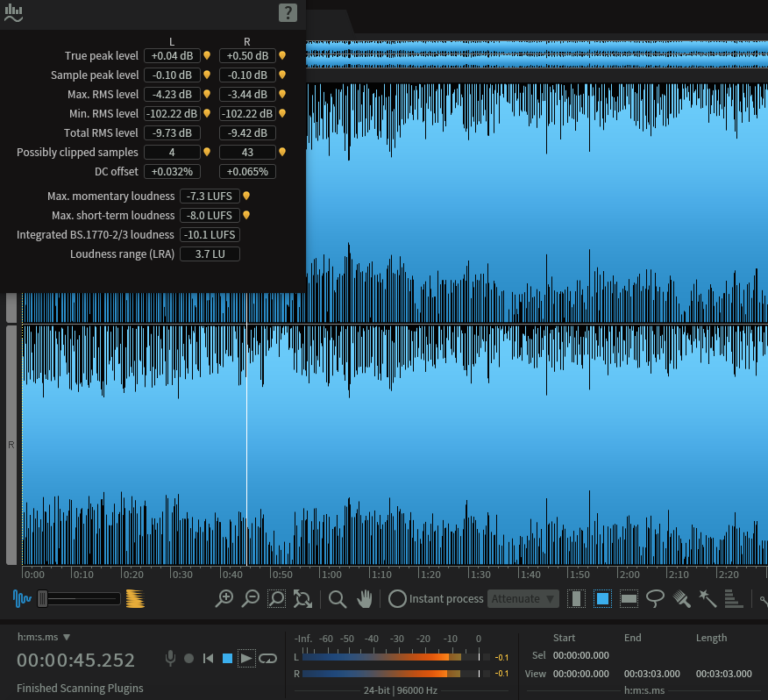
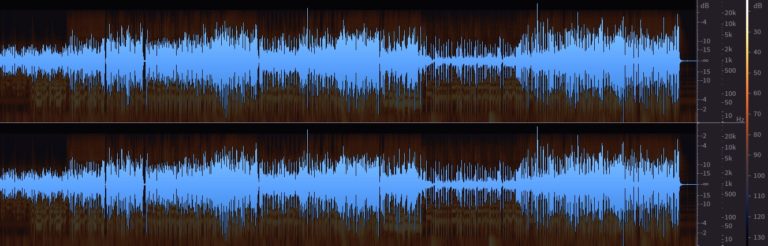
Before I do ANYTHING to the audio in a mastering session, I inspect the raw mix, in a DAW (ex. izotope RX- pictured). While listening, I observe things like volume levels (RMS, peak, LUFS, etc), L/R balance, overall tonality, DC offset, and/or soft clipping…anything that catches my ears or eyes. As you could imagine, It’s kind of a let down when a file has “obvious” errors from the get-go, like missing audio, digital crackles, bad fades or the file happens to be (gasp)….an mp3! These issues happen a lot more than they should. So…
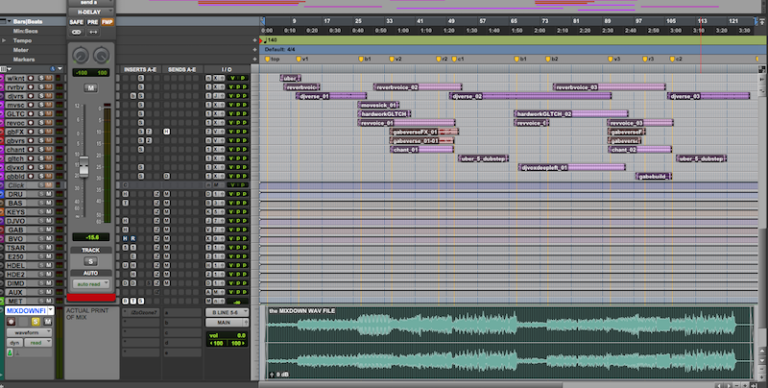
Evaluating the ACTUAL mix-down is your final quality-control check on all your hard work. I have personally worked hours on a mix project, only to accidentally export the wrong buss/output, and embarrassingly send the mastering engineer the effects return of my “brilliant” session! Things like this can and do happen, but you can easily avoid it by doing this…
Bring the final mix down back into your DAW or open it in a separate application. By visually inspecting the waveform, you’ll be able to see:
-if all the audio present (I get silent and/or chopped files every so often)
-if levels are too high or low (peaks above -24dBfs and below 0 dBfs generally work)
-any obvious DC Offset (this is when the waveform “leans” up or down drastically)
-unintentional clipping (listen closely for this too)
-if the bit depth/sample rate are correct (all DAWs will display this somewhere)
By listening to the absolute, final mix-down without being able to actively mix, you’ll also be more likely to catch short-duration clicks, pops, and even issues like corrupted files, mix buss distortion, incorrect bussing, conversion artifacts and missing/weak channels. It also helps to make sure to take a good 10-15 minute break before doing this, that way your ears are nice and fresh!
BELIEVE IT OR NOT… The two most common issues I see at the very beginning of a mastering session are incorrectly named files and data-compressed files. For example, if your session is set at 96khz, 32-bit and being mixed in-the-box, send it to mastering at that exact “spec”. Sometimes people may not even realize that they can change their DAW’s “export” settings, or accidentally have it set incorrectly. I am always more than willing to help with this and can usually help figure it out quickly. Also make sure to label the tracks/files in a way that makes sense…”1038rsongrev_05.wav” means very little to someone like me.
I have always liked this format- “Band Name (optional)_Song Title_Date/Revision_Bit Depth/Sample Rate.wav”, or something similar. Even just the correctly-spelled song title is usually great!
Ok, now that we have the most basic item out of the way, on to the more “fun” stuff…
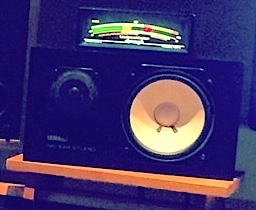
My favorite little mixing trick/hack is the “grot box”- and it’s not just my thing, it’s pretty much industry-standard. As you may know, a lot of people hear most of their music through little, usually crappy speakers, so it would only make perfect sense to at least check your mix that way, from time to time. Getting this (sometimes harsh) “reality check” on your mix is always beneficial in some way(s). Most recording and mixing studios, even as far back as the 50’s, had some sort of grot boxes. The Auratones, NS-10 and Tivoli radios commonly seen in studio photos are being used in a fashion much like I’ll describe.
By listening on something like a cell phone, laptop speaker, ear buds and/or something like a bookshelf speaker (NS-10, etc.), you can get a ‘quick and dirty” re-evaluation of:
-overall balances
-bass presence/audibility
-vocal clarity
-FX levels
-EQ issues
-dynamic range
-compression effects & more…
In order to get the most out of this, you have to know the limitations of your “grot box” and how to compensate. If the bass disappears on the grot box, but sounds loud on your main monitors, then at least you know there’s something going on there and can deal with it accordingly (more on that later…). The point of using something band-limited and lo-fi, like a “grot box”, is to really hear what’s going on in the midrange- which can make or break everything about your mix. To get familiar with a particular grot box’s sound and limitations, know what “good” mixes sound like on them. Listen to a bunch of music you like, are familiar with, and from as many genres as possible. Do this as often as you can! Once you have used it on a few mixes, your ears will acclimate quickly during the session and the benefits will become very apparent.
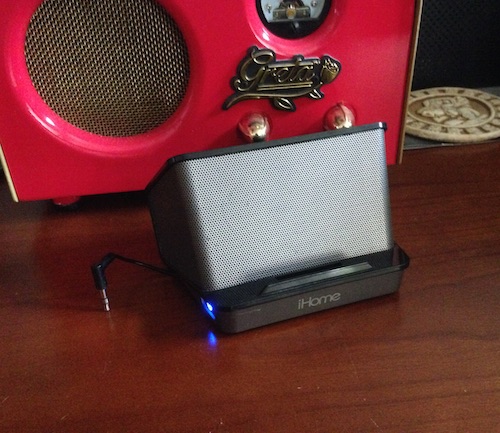
These days my personal grot box is a small, usb-rechargeable system called an “iHome”, which feeds off any 1/8” headphone jack. It sounds a little “boxy”, has very little response below 100Hz, and provides almost no stereo separation, but it is extremely good at exposing crucial issues in a mix- especially when I may have been previously focused on more minute details. I know what music generally sounds like on this, as I have two of them- one in my studio and another in the kitchen that my fiancee and I listen to often. We even take it on vacation and road trips!
COOL TRICK: If all the tracks are all recorded well and completely ready for mixing, i’ll START the mix by setting basic levels on the grot box (iHome, pictured). Once I have a general balance that sounds right, I’ll switch to my main, full-range speakers and immediately find anything that changes drastically or sounds worse. Sometimes, what sounds great on the grot box will sound bass-heavy, or overly “wet” on full-range setups. If that is the case, I’ll start looking at the EQ and harmonic content of the bass instrument(s)….If the vocal sounds correctly-levelled on the grot box, but sounds too “forward” or loud on a full-range system, then maybe i’ll split the difference, compress it harder or adjust the effects on the vocal… Quick little fixes and adjustments like these can prevent common pitfalls that otherwise might go unnoticed. Plus, now I don’t get any surprises later in the mixing (or mastering) process.
It’s shocking and debilitating to find out your hard work falls apart on most real-world speakers, so avoid it. Here’s another tip in that same realm of thinking-
Some other useful “alternative’ monitoring techniques i recommend are- checking your mix in mono, listening to just the S-channel, and using EQ/filtering on your full mix down. Each of these methods can help identify and quantify different characteristics of your mix, and only take a few minutes to do. Like the grot-box idea, these can identify bigger issues that could easily be missed in many mixing scenarios. I group these 3 together yet separately from the grot box tip because I spend less time using these 3 methods during a given mixing session.
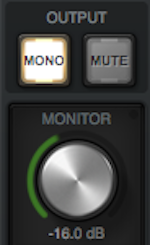
MONO
I’m pretty sure almost every decent console, daw and/or monitor controller has some sort of “mono button”. So here’s what ya do…
Listen to your mix in mono and see if any undesirable changes occur, other than a slight overall volume change (this varies from undetectable to a few dB). Although it may be rare that anyone hears your mix purposefully “switched” to mono, it IS a great worse-case-scenario and can help isolate potential issues easily. If it sounds good in stereo AND in mono, chances are it is going to translate competitively on most sound systems. Here is a short list of questions I ask myself when checking a mix in mono:
-did the mix get muddy?
-does the lead vocal sound loud enough…too loud?
-do any volume levels or balances change for the worse?
-are there any effects that sound weird or missing?
-are there any spots where “panned” elements change volume unexpectedly?
-Can I live with someone hearing it like this or similar?
Each of the potential issues I have mentioned above have solutions or at least “band-aids”, but sometimes it comes down to that last question- “can I live with someone hearing it like this?”. There are things can be adjusted to make a mix sound better in mono, and usually it also helps the mix sound better in general, but certain losses may be accepted if they’re worth it. Sometimes, just being aware of it will help, even without an instant solution. While mastering, I certainly check in mono for some of the same things; so the earlier it gets checked, the better!
Typically what causes disparities between stereo and mono playback of a (stereo) mix can be contributed to panned elements, polarity/phase mistakes, delays, mic technique, synth patches and “stereo” FX. Mostly these are changing the phase relationship between the L and R channels (more on phase in later posts). Sometimes, in order to get a certain effect, I may need to tweak it so that it sounds good on both mono and stereo. Panning, especially wide panning, can contribute to mono “incompatibility”, so that’s a big one to be careful with. Sometimes it’s worth risking a little weirdness in mono if the sound in stereo is amazing. Mixing is full of compromises, so do what you think is best. I could write a novel about all the possible issues between mono and stereo playback and how to deal with them, but for now, just being aware of this phenomena is a great start!
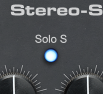
SIDES-ONLY
If you have the ability to listen to just the S channel (within an MS “matrix”, via plugin or other means), it will allow you to hear unintended distortion, mix buss compression and/or any conversion artifacts. Typically what I look for when monitoring the S (Side) channel is unintended distortion and/or “space monkeys”.
If you are hearing excessive or unintended distortion, it may be a warning sign that there is more of that going on the mix than you had previously realized! This is an easy way to zero in on mix buss distortion and even over-compression. Sibilance can also be caught using this method. As always, make sure any changes you make are evaluated in full stereo and in mono. This method is more about making yourself aware of details you may be missing, rather than making rash, immediate changes.
“Space monkeys” is a term to describe the effects of bad digital conversion(s). If you are hearing a washy, almost granulated sound in the S-channel, there’s a good chance something in the mix wasn’t properly converted or was digitally corrupted to some extent. Usually if I hear this, it means that one of the prominent audio files was converted from .mp3 or something dreadful like that. Sometimes I’ll catch this during mastering or when working with stems, and when I point it out to the client, they realize they have accidentally rendered their wav files from a data-compressed source, like mp3, m4a or a scratched-up CD. Sometimes there’s nothing that can be done to rectify the issue, but once again…the more you know, the better you can mix!
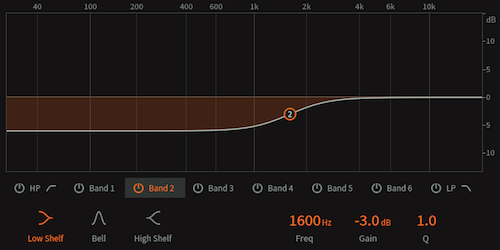
The SIBILANCE CURVE
The “sibilance curve” is used to check the frequency area between (roughly) 3khz and 12khz. The way I typically set this up is by placing a simple EQ (plug-in or hardware) over the whole mix and apply these settings:
-Using a low shelf, cut about -6dB from 2.5khz and below. Do not boost the sibilance range, as this could result in overloads.
-make sure to turn this off when you’re done checking the sibilance range!
By doing this, we are not only looking for sibilance, but for ANY issues in the top end of the mix. Quite often, and for many different reasons, people’s mixes are less “bright” than they intend them to be. Some if this comes from having treble-heavy speakers and/or ear fatigue- caused by hours of continued listening. By itself this isn’t a huge issue and can easily be tended to in mastering. The bigger issues occurs once the EQ spectrum is optimized in mastering and the issues rear their ugly heads! Here are some examples of things that can be discovered when double-checking your mix through the sibilance curve:
-any unintended/offensive vocal sibilance (loud “esses”, “t’s”) or other harsh, treble-y sounds that would reveal themselves in mastering. Use a de-esser or other audio tool(s) to reduce/fix any problems, as needed. This can also include “overcooked” cymbals, hi-hats and percussion.
-unintended crackles, clicks, or pops in the audio (more common than you’d imagine)
-digital artifacts (like those “space monkeys”, bad edits, clipping, etc.)
-bass instruments that completely disappear! Not always an issue, per se, but good to be aware of…
There are also many speakers out there that naturally accentuate the EQ and issues just mentioned. Certain headphones (ex. AKG k702), “prosumer” monitors and even some audiophile speakers get the same effect (ex. Tannoy Little Gold 12). Many professionals have been using these for quite a while now- almost like a second “grot box”, but for checking the top-end specifically.
Now to inspect the low-end..

the BASS CONTENT CURVE
The main idea with the “bass content curve” is to see how the low end of the mix is working and what’s actually there. The recipe for this is easy:
Using a low pass filter, cut everything above 100z or so. Sometimes this frequency is a bit or lower, and varies mix to mix, but this is a great start point.
-As with the all monitoring-only curves, make sure to turn it off when you’re done checking the bass content.
Typically I use this curve to see how my bass instrument(s) are balanced and how well they are melding. Re-balancing the kick drum to the bass or even EQ-ing them a bit can help the low-end work correctly and make the mix master-ready. However, like a few of the ideas above, it may not necessitate immediate action or changes, but can help you to “see inside’ of your mix a bit better. Knowing what’s happening down there in the bottom few octaves can reveal some of the biggest issues of all, like:
-instruments that cover each other up or cancel each other out
-a low end that has no punch or impact
-unintended rumble and excessive sub content
MORE CURVES?… There are plenty more examples of EQ curves that can be utilized when monitoring a mix. Sometimes using a high pass filter at around 150 hz can reveal bass elements that disappear on bass-lean systems. Occasionally I may also combine the two curve shapes (from above) to inspect the midrange; but checking my grot box and occasionally checking a few references usually does the same job. That brings us to the concept of using reference tracks…
Having and using reference tracks can be a very helpful way to make sure you are hitting the mark you intend. By “reference tracks”, I am referring to professionally recorded, mixed and mastered song(s) to “reset” your ears and to “A/B” against your current mix. Now I’m not talking about trying to make your production sound EXACTLY like something else, but as a quick reality check, it can be ever-so-helpful! I also highly recommend starting every mix (or mastering) session with a quick listen to your reference tracks or just some well-produced music of a similar genre. Maybe just throw something on for a few moments, while things warm up and the session loads. This will acclimate your ears to the room, speakers, volume levels and even help you realize if everything if working properly in the system….yourself included! I like to do this for a minute or so after each break, and also before trying any new speakers or headphones- grot boxes included. Think of the reference track as a “familiarizer”.
I think it is important that you have at least one and no more than 3 reference tracks. The idea is that we’re checking the mix against this every so often, and only for a fairly quick listen. Having too many tracks to pick from can get confusing and time-consuming very fast!
Using references that sound relatively close to your style and sonic goals will help more than something 180 degrees from what you’re trying to achieve. I like having one track that is VERY similar to my goal, and another one that is fairly close, but extremely familiar. Between these two it is easy to tune your ears properly, and not get caught up in any one detail.
It is also a good idea to secure reference tracks that are of the highest quality, as far as format goes. Although it’s not a deal-breaker, using a really bad youtube “rip” may not get you there! I think 16 bit and 44.1khz is usually sufficient for a mixing reference. For mastering, I try to use 24bit, 96khz references, but sometimes these can be hard to find (I like HDtracks for this).
Finally, make sure to match the overall volume of the reference track(s) to your mix, and adjust accordingly if overall levels change. If the volumes match closely, it is much easier and you won’t find yourself trying to push everything up in an attempt to match an already-mastered track. I like to import my reference tracks into the DAW session, so that I can adjust and play it back instantaneously.
Like I said earlier, the idea here isn’t to copy the sound of these references; the aim is to bring you back into focus when you may have strayed away from your goal. When I use the reference tracks, I am thinking more globally- meaning that I am listening to for the overall impact and sound, rather than minute details. Sometimes, it can be nice to emulate a detail you hear, even though that’s not what I usually recommend.
MAKE IT A HABIT! These days, my clients’ tastes can vary so much that it can be hard to find good references. I have a small library of reference tracks (of many styles and production qualities) that I know and love, but sometimes these won’t work well for a client’s particular needs. As a result, I have been asking every client to pick a reference track (or two) and I buy it if I don’t already have it. Not only do I end up making the client super happy, but sometimes I find new artists that I like, and the tracks become part of my reference library. I think that’s cool, especially because its hard to find new music when you’re in the studio, working all day! Speaking of which….

I’ll make this tip short and to the point- breaks are so, sooo important! I recommend taking at least a ten minute break for every hour you have been actively mixing. Although that may seem like “lost time”, it will actually save you time and work in the long run. After about an hour of continued listening, your ears start to become less reliable and it becomes easy to lose focus on the big picture. By taking a break, you not only give your ears a chance to rest and reset, but you also give your mind a chance to break out of whatever thought patterns you may have been stuck in.
Personally, I take a break before finalizing anything. I also try to get at least 10 minute break for every hour. If I end up working for 2 hours, that’s not a big deal- I just take 20-30 minutes after the 2 hours. Sometimes I prefer that and other times its the once-per-hour routine. Either way, this may be one of the most important tips I could ever mention.
Like this post and want to see more? fuzzywallz.com/posts/